Iveco Daily III mirror bracket to dashcam mount
Making use of an existing fixture to mount your dashcam or action camera just makes sense.
 |
| mounting system fig.2 |
We offer the windscreen mirror dashcam mount as a stand alone item. You can then use action camera arms to connect your device.
 |
| fig.3 |
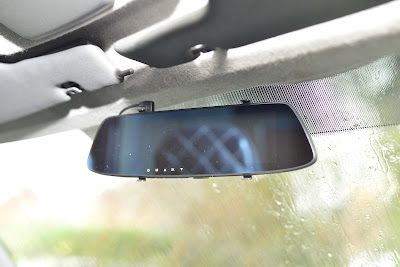
As you can see in the fig.1-2, we have used a mirror dashcam that normally fixes to an existing rear view mirror with elastic straps. We had tried this mirror on a number of different brackets before using this small and simple bracket which, via the array of connecting arms displayed, offers full adjustment of the mirror.
Fitting guide
Windscreen mirror dashcam mount.
 |
| fig.4 |
Fitting couldn't be easier. Simply align the legs on the mount with the windscreen bracket top and slide down till it stops. This should be an easy motion. If excessive restriction is felt, check for obstruction in the rails.
Mirror bracket.
- an adhesive such as Araldite double bond
- sandpaper
- masking tape (optional)
Sand the mating faces of the bracket and device you intend to mount (you may wish to use masking tape to prevent excessive scratching to areas not being bonded to).
Mix the adhesive to the manufacturers instructions and apply a thin layer to the bracket. Check orientation of the male end suits your needs then apply to the device and allow to fully dry.
Mounting
 |
| fig.6 |
Loosely assemble and align for comfortable viewing, this can be adjusted further later.
When tightening, take care not to over torque the fasteners as the plastic parts may crack.
If you are finding things keep moving, sanding the inner faces of action camera male and female ends can help prevent slippage like in this video.
Final note.
We have not tested this mount any further than the dashcam mirror as per fig 1-2 which the mounting system is more than adequate for. Caution and common sense should be used when mounting anything heavier. A laptop, for example, would be a terrible idea.
Enjoy.


Comments
Post a Comment