Posts

Showing posts with the label 3d rendering

Yamaha FZ600 Chain Guide Swingarm Protector
Image
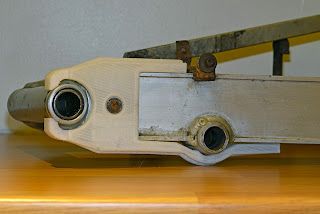
  Yamaha FZ600 Chain Guide Swingarm Protector fig1.1 - HPE chain guide for Yamaha FZ600 Intro We have produced two chain guides / swingarm guards for the Yamaha FZ600 and early FZ400. We have a hard-wearing version in nylon and a TPU version which is more like the traditional rubber. This takes best advantage of an FDM 3D printer by producing a part in small batches to match the rarity of your motorcycle whilst also making them lighter than the OEM part.  The chain guide features increased wall thickness to allow the already highly wear-resistant material to last even longer. We expect the TPU part not to be as hard-wearing as the Nylon but it has the advantage of being cheaper and much easier to fit.  It is worthy of note however; that a poorly adjusted, unlubricated and/or rusty chain will make short work of eating through any chain guide. Fitting Guide The HPE TPU FZ600 chain guide will fit and remove in the same way as the OEM part, as it can flex and stretch into pl...
Iveco Daily III mirror bracket to dashcam mount

Image
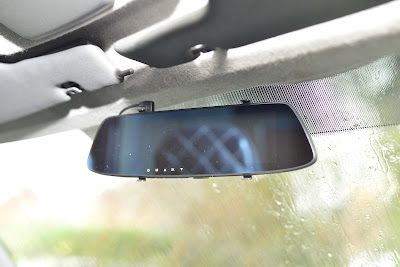
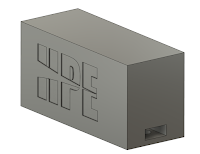
  Making use of an existing fixture to mount your dashcam or action camera just makes sense. mirror fig.1 mounting system fig.2 We have developed a bracket that slots into the rear view mirror bracket on Iveco Daily III vans. From this mount you can attach any action camera brackets you desire in order to mount a device off of this bracket. As demonstrated in fig.1, we have mounted a combined rear view mirror dashcam and screen with the additional help of a male pad that we have also designed. We offer the windscreen mirror dashcam mount  as a stand alone item. You can then use action camera arms to connect your device. fig.3 We also offer the windscreen mirror dashcam mount with a mirror bracket  as seen in fig.3, which will allow you to attach devices that are not compatible with action camera mounts. As you can see in the fig.1-2, we have used a mirror dashcam that normally fixes to an existing rear view mirror with elastic straps. We had tried this mirr...

Mightily small handles - About &Fitting guide

Image
1.1 Mighty small handle 3D drawing. Contents A)    Intro - About the mighty small handle B)   Fitting guide A)   Intro - About the mighty small handle 1.1 HPE Folding Tool kit handle CP PETg After the success of our folding tool kit handles, we decided we needed to go bigger, by going smaller.    The idea was pretty simple; make a handle for smaller shadow foam shelves that could be removed from  from a larger kit  to enable small items to be brought closer to the work area whilst still keeping things organised.  Design Key elements were: They have to be very compact. Light weight. Be easy to use. be strong enough to support a wide range of tools. fig 2.2 testing After some testing a final design was chosen with a base size taking up 40mm X 15mm of space each. Not bad at all! Stress testing was carried out till we ran out of things to hand off of our test handle, ending up with an  8kg per handle load,  a FoS (Factor of S...

Getting a handle on things

Image
  Pelicase have an endless assortment of cases and ideas for how you could use them 1.1 The need to build a tool kit has resulted in an over engineered answer to a problem normally answered with some webbing and a couple of rivets. But you want some too. Portability and relative light weight was leading us down the root of a Peli case based kit with foam shelves for convenience and easy tool control (very important in the aerospace industry where the kit will be used) just like the examples in fig 1.1.  Of course we are not the first people to want to use foam shelves in a Peli case and as such there are a number of ideas out there for what to do. These are generally consisting of : Tool foam comes in many shapes & colours 1.2 Cut outs in the foam Webbing straps Fold out shelves running a slim case with foam on the base and lid. These are all fine but we thought we could come up with something a bit more elegant. The design brief was simple: They needed to be strong enoug...

It just takes a picture

Image
Broken an unobtanium part? Fear not! Armed with a scanner and a rule, we may be able to solve that problem for you. After a chain failure the already very brittle looking rear mudguard on a Yamaha TZ250 took quite the beating. Missing a corner it was now looking very tatty and in need of replacing. Something that isn't super easy on a 40+ year old bike. This was a great opportunity to try out a new technique where you get an image of the component , scale match it then make a copy in Fusion 360. There are a number of potential advantages to working this way: For one, you will get an accurate copy of the component you are trying to recreate quickly but you will also have a basis to improve upon the design, depending on your taste. As you can see on the image on the right there is a large chunk missing that chain side which some artistic licence is require but otherwise this is a simple flat plate with an added joggled section to allow for wheel clearance when the chain is adjusted w...