Getting a handle on things
 |
| Pelicase have an endless assortment of cases and ideas for how you could use them 1.1 |
The need to build a tool kit has resulted in an over engineered answer to a problem normally answered with some webbing and a couple of rivets. But you want some too.
Portability and relative light weight was leading us down the root of a Peli case based kit with foam shelves for convenience and easy tool control (very important in the aerospace industry where the kit will be used) just like the examples in fig 1.1.
Of course we are not the first people to want to use foam shelves in a Peli case and as such there are a number of ideas out there for what to do. These are generally consisting of :
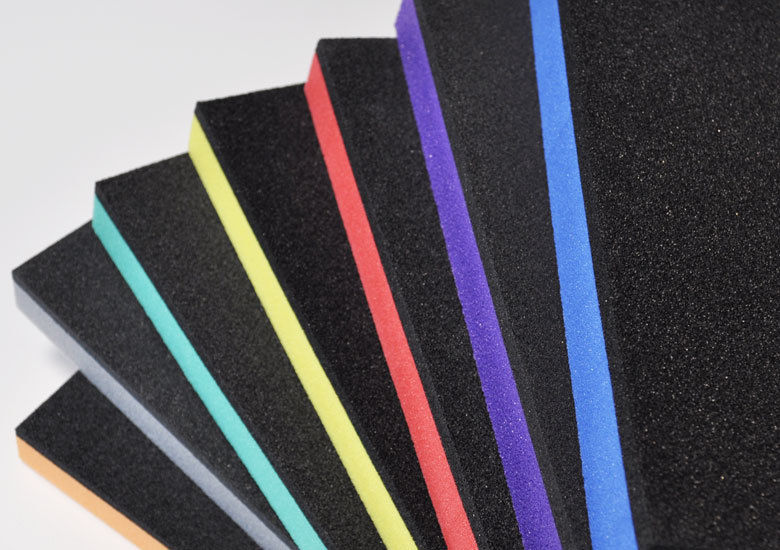 |
| Tool foam comes in many shapes & colours 1.2 |
- Cut outs in the foam
- Webbing straps
- Fold out shelves
- running a slim case with foam on the base and lid.
These are all fine but we thought we could come up with something a bit more elegant.
The design brief was simple: They needed to be strong enough to support the heaviest shelf, compact enough not to take up too much space and not add to the already high weight of the tool kit.
This set us off brain storming ideas and settling on a vertically folding design similar to what you find on a travel case you might take on your holidays. However after a bit more thought; it was clear that it would be tricky to come up with a 3D printable design that would remain compact, light and strong enough.
 |
| 1.3a |
A fair bit of time sat in front of the computer later and we had a handle design (fig 1.3a).
This handle has a thin and simple design to make printing and cutting into foam easy whilst still being ergonomic to use. A chamfered outer edge allows the handle to be easily raised to the vertical where a half bevelled knuckle locks the handle in the vertical position to prevent swinging whilst the tool shelf is manoeuvred.
The handle is fastened to a base plate (fig1.3b) which is again designed to take up minimal room whilst being strong and light weight. The base plate features captive fasteners for the hinge and two M3 mounting bolts. Having the mounting bolts go into the base plates adds strength to the base plate and reduces the amount of things coming out of the bottom of the shelf which may damage underlying shelves or the surface they are placed on. The foam itself also adds support to the base plates.
 |
| 1.4 |
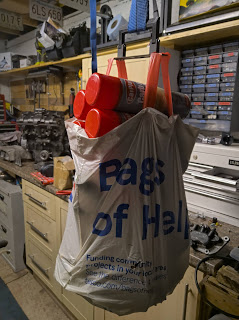
Without a lab to work in, some improvisation was needed and a Tesco bag for life was just the start.
With the handle assembled to some sheet steel and suspended from beam, the bag was filled with tools and an assortment of other garage flotsam till something happened.
What happened was the bag filled up so lighter things were removed and heavier added but now the bag was starting to split with the handle not even budging!
Tools were then moved to an ammunition tin and eventually a complete Halfords Professional tool kit was added to the mix till the handle base plate finally failed at 40Kg.
One handle could carry the total contents of the tool kit! Even if we reduce that to a conservative safety factor of 5 we have 8kg per handle which is perfect for our needs.
 |
| 1.5a |
These have a slightly different look and feel to standard PETg; with a softly textured surface and as Lotus would say "added lightness".
 |
| 1.5b |
The base plate got a small redesign despite the successful test. The area where the handles mounting cap head bolt head sits has been enclosed. This not only tidies this part of the base plate up (it will be mostly buried in foam but will still be tidier) but also beefs up the area where it failed in the test.
These need to be printed to match the depth of the foam in which they are mounted in. It is a good job we designed a few different length then!
During this redesign we also started printing the base plates flat to the bed which makes them come out a lot tidier and reduces failed prints.
 |
| 1.6a |
The handle folds out and locks in the up position to give a comfortable and easy grip. It is easy to forget how light weight they are as they do feel very sturdy even on the heavier shelves. Though the Aluminium backing may bow, the handles don't so much as creek as the load is manoeuvred.
When folded flat, the handle fits seamlessly into the foam, giving no obstruction to stacking yet is still easy to access when needed again thanks to its chamfered back edge leaving it slightly proud of the cut out hidden underneath.
We chose M3x12mm button head screws supported by a penny washer to mount these handle base plates through the 1mm thick aluminium shelf backing material. The button head profile adds the minimum thickness to the head allowing for less chance of damage to the shelf below it.
During the process of designing the handles, we decided to also create some corner protection for the shelves. at 1mm thick they aren't going to survive abuse but respectful use of the tool kit will be helped as these corner protectors guide the shelf into the kit without scratching the box or allowing the corners of the shelf from getting squashed or rounded. They also help in stacking as they prevent the corners from sagging. The corner protectors are held in by 1 3.2mm pop-rivet and a small amount of adhesive to prevent rotation.
 |
| 1.8a |
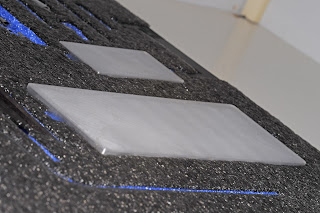
If that wasn't enough, we also made lids as pictured in fig1.8a/b for the double depth sockets in the kit. These will help prevent the sockets from jumping out if the shelf is knocked and also prevent dirt from dropping into the gaps between them.
These scalable lids are not currently being made available for sale on eBay but can be requested through our Facebook page as a custom order.
 |
| 1.8b |
 |
| A near complete kit |
Evolution
 |
| 2.1 Improved base plate design |
The first batch worked (and continue to work) extremely well on our aircraft tool kit. A bit of time on Fusion 360 however showed our design needed some tweaking to make use of parameters for better scaling.
The handle itself remains unchanged but the base plates have seen a redraw from the ground up.Following exactly the same dimensions as before, it might look like we didn't really do anything. Whilst we were there though we took the opportunity to optimise the design a little.
One such optimisation was; to allow the holes, for the base mount bolts to pass into, to scale in size with the base plate height. This helps with the shortest 20mm base plate which had a very limited top layer under the hinge. It also helps with the long 50mm base plate with added strength from the cavity tube and, if a longer bolt is used, add additional strength again.
The holes themselves are also symmetrically positioned, an error in the previous base plate desing caused by alterations made during the design process.
The holes themselves are also symmetrically positioned, an error in the previous base plate desing caused by alterations made during the design process.
The more obvious change was to remove the chamfers from the top of the base plates. These were an aesthetic choice during the initial design but the back edge printed poorly and seeing as these base plates are flush fitting with the foam, really didn't add anything to the look. In fact, a flat top now sits flush with the foams surface giving a more seamless look.
The other change we have made is to change from a 0.4mm to a 0.6mm nozzle whilst printing. This means these handles print faster with less perimeters but are also stronger with much better layer adhesion.
If you want to read fitting guides for these Light weight handles and Layer corner protectors, hit the respective link.
More importantly you can find Light weight handles and Corner protectors on these respective links or send us a message on Facebook or Google
Don't forget to send us pictures of your finished kit on Facebook or tag us in on Twitter @HeggsPE.


Comments
Post a Comment