Posts

Image
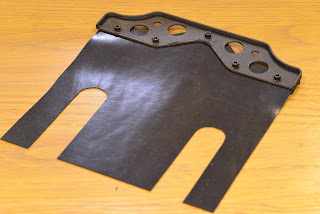
I am fortunate enough to own an upper mudguard for a Yamaha TZ250/350 C/D/E chassis, it came with my TZ chassis, but I knew I could quickly make a copy and other wanted one without spending upwards of £90 on it. A quick scan and an hour or so spent on Fusion 360 later and I had a workable model. I only required a couple of minor alterations to get the frame to fit perfectly, then a PLA copy of the rubber guard itself was printed to use as a template. Second print in carbon fiber PETg Once the rubber arrived (I opted for 1mm rubber sheet rather than the OEM 1.5mm to add some lightness) I cut out the first sheet and rough assembled the guard using M3 cap head allen bolts. Annoyingly I hadn't made any alteration over the OEM guards okay fit but it works as advertised so remains un altered for now. I actually quite like the cap head allen bolts but with the risk of them easily vibrating loose, I decided to finish this guard with pop rivets. These are light weight and are more true to t...
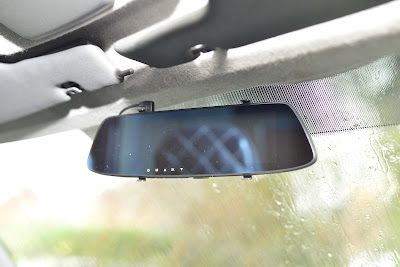

Iveco Daily III mirror bracket to dashcam mount

Image
  Making use of an existing fixture to mount your dashcam or action camera just makes sense. mirror fig.1 mounting system fig.2 We have developed a bracket that slots into the rear view mirror bracket on Iveco Daily III vans. From this mount you can attach any action camera brackets you desire in order to mount a device off of this bracket. As demonstrated in fig.1, we have mounted a combined rear view mirror dashcam and screen with the additional help of a male pad that we have also designed. We offer the windscreen mirror dashcam mount  as a stand alone item. You can then use action camera arms to connect your device. fig.3 We also offer the windscreen mirror dashcam mount with a mirror bracket  as seen in fig.3, which will allow you to attach devices that are not compatible with action camera mounts. As you can see in the fig.1-2, we have used a mirror dashcam that normally fixes to an existing rear view mirror with elastic straps. We had tried this mirr...

HPE Fairing punch protectors

Image
As fit on a Honda VFR750 RC24 1.1   1.2 Here is a simple and proven idea that we have taken and made something a little better. In a slow speed spill, it is not uncommon for the fairing bracket to punch through a light weight fibreglass fairing. A simple solution to this is to put a large penny washer on the inside and outside of the fairing to spread the lead a bit which works great. it doesn't look the best however and of course there is that weight penalty too. Our solution takes on this great idea with the aim of making something that looks better and is lighter whilst maintaining much of the strength of the penny washer. VFR750 RC24 inside fairing 1.3 On the outside you have a fairly familiar looking finishing washer (sometimes called a spreading or cone washer fig1.1). This has a conical shape which nicely blends the button head fastener into the fairing. With its high shoulders it should impact the floor just before the button head which will have some very minor i...

Service Focus: Welding

Image
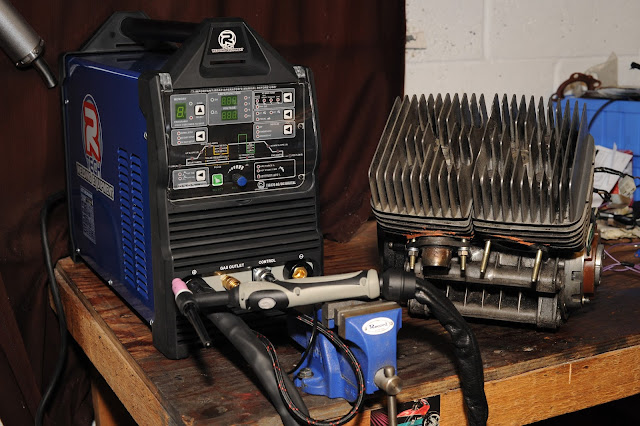
Fig 1.1 Fig 1.2. Welding is a trade all in itself, however; armed with MIG and TIG welders  we get this job done in house along side everything else. A common job that comes in is damage to motorcycles, either from crashing or the engine taking lumps out of itself. More often than not this ends up being an aluminium weld such as this paddock stand bobbin (see fig 1.2) that got ripped off of a customers Honda CBR600RR in a spill. This is a fairly quick and simple weld on paper but the prep is what takes all of the work. There were holes in the swing arm where the base metal failed rather than the weld and the edges were turned up and bent. To add to the fun there was a few years worth of chain lube and road grot ingrained in the metal so a thorough clean was needed too. Once the prep was all done, now came the task of marrying a small but thick bobbin mount to a thin but large swingarm. Thankfully pulse mode on the Rtech digital tig 170 was here to save the day which made sh...

Mightily small handles - About &Fitting guide

Image
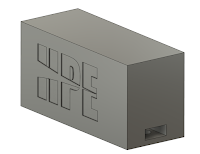
1.1 Mighty small handle 3D drawing. Contents A)    Intro - About the mighty small handle B)   Fitting guide A)   Intro - About the mighty small handle 1.1 HPE Folding Tool kit handle CP PETg After the success of our folding tool kit handles, we decided we needed to go bigger, by going smaller.    The idea was pretty simple; make a handle for smaller shadow foam shelves that could be removed from  from a larger kit  to enable small items to be brought closer to the work area whilst still keeping things organised.  Design Key elements were: They have to be very compact. Light weight. Be easy to use. be strong enough to support a wide range of tools. fig 2.2 testing After some testing a final design was chosen with a base size taking up 40mm X 15mm of space each. Not bad at all! Stress testing was carried out till we ran out of things to hand off of our test handle, ending up with an  8kg per handle load,  a FoS (Factor of S...

All corners protectors

Image
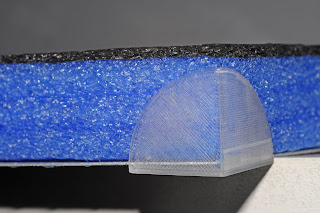
  1.1 Tool kit corner protector 30mm Fitting our tool kit layer corner protectors is easy, adding protection to the foam and assisting in layer stacking. Here we will walk you through how to fit them. However we will start a little before that just in case you are reading this whilst trying to decide what to buy. We have also peppered in a few suggestions on where to find items you will need with links or suggested brands in  orange . Considerations before buying You are going to need to know  what things you intend to put in this container  (tools)  and how deep the foam will need to be for those things to sit flat.  Once you know this, you can workout a rough layout and figure out what size container is best for you (don't forget to leave room for the handles , factor in backing material and any protrusions). You will probably bounce around these tasks a bit as you pick suitable tool boxes then seeing how you could reorganise your tools to make best...