Posts

CBX1000 plastic parts

Image
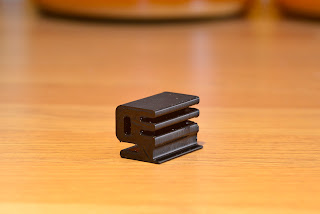
 Everyone's favourite 6 cylinder motorcycle is getting some attention. We have developed a version of Honda's screw cap part number 64109MA2000 which fits on the front fairing leg screws. These often wear and fall off so we made them fit a little tighter and managed to keep the cost right down whilst we were at it. Make sure they are nice and warm before fitting as they are a small part and liable to split along the layer lines during fitting. These caps fit the following classic Hondas:  CBX400F2 C Euro 82,  CBX550F2 C & D 82-83,  CBX1000 B & C 81-82,  CB750F C 82 CB750F2 C & D 82-83, CB900F B & C 81-82, CB900F2 BOL D'OR B & C, You can buy yours here

Movano

Image
  Here are some products we have produced to fit the Vauxhall Movano and Fiat Ducato vans. Headunit infill Fits in the gap left by the single din head unit/shelf allowing you to fix a phone mount or larger tablet screen. It is set slightly proud of the dashboard to give a large flat surface for optimal adhesion when using adhesive tapes. You can get yours on ebay .

Yamaha TZ250/350 parts

Image
 Here is a list of Yamaha TZ parts For now it is a place hold for images, I will update this shortly. TZ250/350 C/D/E Fuel tank rubber damper mounts Check out the item available now on eBay . TZ250/350 E/F/G Fork top caps

Honda CBR400 plastic parts

Image
 Here are some examples of products we have made that fit the Honda CBR400 (among many others). Fuel tank side cushion 17516KAZ000 Shown on a Honda NSR250 MC28 This does not come with the adhesive tape you would find on the OE part, as it easily washes off when fuel is spilled on it. We leave it to the customer to choose to use tape, adhesive foam or to use a more appropriate glue like 1300L. Stem cap Initially produced for the CBR400 we soon found out this cap is common to a load of Hondas that were both designed for this cap and also for those that were intended to have a capped nut fitted. CBR400RR NC29 VFR750 RC24 Efforts were made to add strength during shipping to our product by designing in support material that could double as packaging. This has had some success but cannot protect from abuse. It still is a great example of a production, normally disposable part, being reused in the packaging process. Sub air filter This sub air filter fits over 765 Honda models from t...

Yamaha Mono Cross XT chain guide

Image
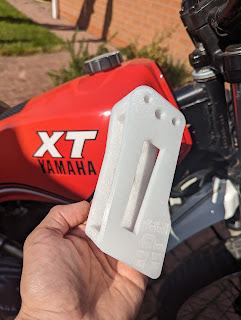
Intro Here you find some products we make derived from parts that were OEM on the  1982 Yamaha XT200. Chain guide The Chain guide is not unique to the XT200. It is also the OEM part on the XT125, XT400, XT550 and DT125LC. We took inspiration from the OEM part and made a few improvements along the way. The silhouette remains the same whilst a 3D printing optimised front face makes for a clean look that both looks clean and suits this classic motorcycle. The inner arm is offset inward like the OEM part but it is also  slightly angled so it doesn't suffer with chain rub as badly as the original did. We have also chosen to print this in PETg, a material that wasn't really an option back then and offers superior resilience whilst being 100% recyclable and by virtue of its hollow design, lighter too. Most of these details could easily go without great fanfare but what most will be more excited by is the fact that we can offer this part in a wide range of colours and other materials ...
Image
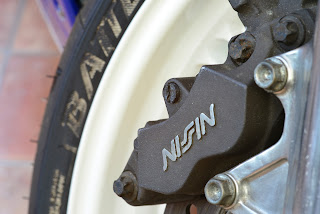
Intro A friend of mine had complained about loosing those silly little caps from his Nissin callipers and then faced the issue of not having them fitted ie. seized calliper pins. Design A quick potter about the workshops  looking for a loose calliper and I found the part I wanted on the NSR250 MC28 as I popped in for a brew. A short while later I had it measured as an M10/1mm and 15 minutes later I had finished my brew and the printer was making some noise. I could have had them done quicker but first time round I wanted to add the dimple in the middle of the slot which I quickly binned to add strength. I made them long at first to add some meat but was the over hang just makes them look loose so I cut them a bit shorter.   With the length about right I was basically done. Printing in CF PETg for heat dissipation, I changed to PETg as I didn't want to cause difference metal corrosion (yes carbon is in that chart). This however was a bit soft for my liking so went with ASA...

Yamaha FZ600 Chain Guide Swingarm Protector

Image
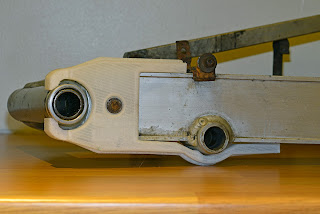
  Yamaha FZ600 Chain Guide Swingarm Protector fig1.1 - HPE chain guide for Yamaha FZ600 Intro We have produced two chain guides / swingarm guards for the Yamaha FZ600 and early FZ400. We have a hard-wearing version in nylon and a TPU version which is more like the traditional rubber. This takes best advantage of an FDM 3D printer by producing a part in small batches to match the rarity of your motorcycle whilst also making them lighter than the OEM part.  The chain guide features increased wall thickness to allow the already highly wear-resistant material to last even longer. We expect the TPU part not to be as hard-wearing as the Nylon but it has the advantage of being cheaper and much easier to fit.  It is worthy of note however; that a poorly adjusted, unlubricated and/or rusty chain will make short work of eating through any chain guide. Fitting Guide The HPE TPU FZ600 chain guide will fit and remove in the same way as the OEM part, as it can flex and stretch into pl...
Image
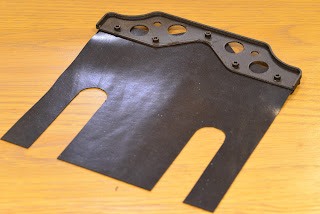
I am fortunate enough to own an upper mudguard for a Yamaha TZ250/350 C/D/E chassis, it came with my TZ chassis, but I knew I could quickly make a copy and other wanted one without spending upwards of £90 on it. A quick scan and an hour or so spent on Fusion 360 later and I had a workable model. I only required a couple of minor alterations to get the frame to fit perfectly, then a PLA copy of the rubber guard itself was printed to use as a template. Second print in carbon fiber PETg Once the rubber arrived (I opted for 1mm rubber sheet rather than the OEM 1.5mm to add some lightness) I cut out the first sheet and rough assembled the guard using M3 cap head allen bolts. Annoyingly I hadn't made any alteration over the OEM guards okay fit but it works as advertised so remains un altered for now. I actually quite like the cap head allen bolts but with the risk of them easily vibrating loose, I decided to finish this guard with pop rivets. These are light weight and are more true to t...

Iveco Daily III mirror bracket to dashcam mount

Image
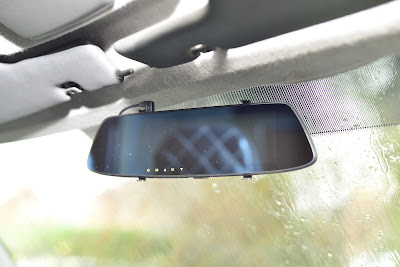
  Making use of an existing fixture to mount your dashcam or action camera just makes sense. mirror fig.1 mounting system fig.2 We have developed a bracket that slots into the rear view mirror bracket on Iveco Daily III vans. From this mount you can attach any action camera brackets you desire in order to mount a device off of this bracket. As demonstrated in fig.1, we have mounted a combined rear view mirror dashcam and screen with the additional help of a male pad that we have also designed. We offer the windscreen mirror dashcam mount  as a stand alone item. You can then use action camera arms to connect your device. fig.3 We also offer the windscreen mirror dashcam mount with a mirror bracket  as seen in fig.3, which will allow you to attach devices that are not compatible with action camera mounts. As you can see in the fig.1-2, we have used a mirror dashcam that normally fixes to an existing rear view mirror with elastic straps. We had tried this mirr...

HPE Fairing punch protectors

Image
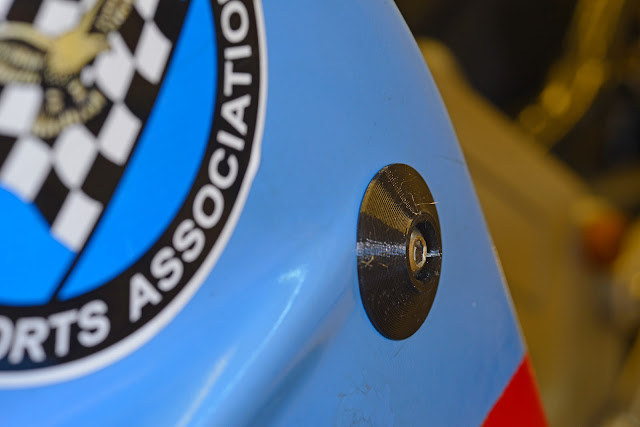
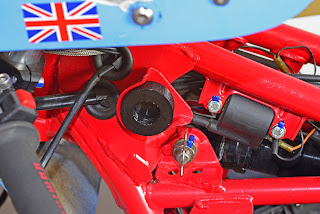
As fit on a Honda VFR750 RC24 1.1   1.2 Here is a simple and proven idea that we have taken and made something a little better. In a slow speed spill, it is not uncommon for the fairing bracket to punch through a light weight fibreglass fairing. A simple solution to this is to put a large penny washer on the inside and outside of the fairing to spread the lead a bit which works great. it doesn't look the best however and of course there is that weight penalty too. Our solution takes on this great idea with the aim of making something that looks better and is lighter whilst maintaining much of the strength of the penny washer. VFR750 RC24 inside fairing 1.3 On the outside you have a fairly familiar looking finishing washer (sometimes called a spreading or cone washer fig1.1). This has a conical shape which nicely blends the button head fastener into the fairing. With its high shoulders it should impact the floor just before the button head which will have some very minor i...